Booking buttons for your services – plus more!
![]()
Here is a round-up of the latest feature released to Timely on June 10th.
Booking buttons for services
This was one of our most requested features and now it’s here! You can now download a booking button for each of your services and place it on your website. Clicking the Book Now button takes the customer directly to the date selection page with the service pre-selected:

To grab booking buttons for each of your services simply head on over to Promote > Booking buttons. Then click into “Individual booking buttons for each of your services“:
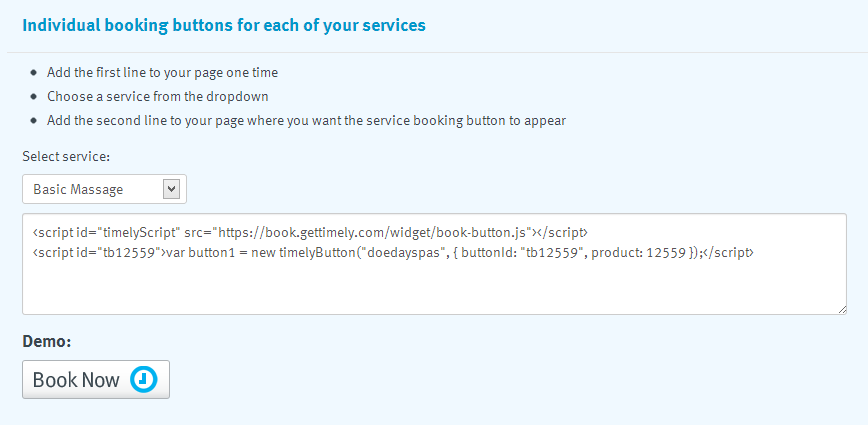
To add booking buttons to your website, make sure you put this line somewhere at the top of the web page:
<script id="timelyScript" src="http://bookings.dev.gettimely.com/widget/book-button.js"></script>
Then using the drop-down, select which service you need a button for. The second line of HTML code will update and you can then copy and paste it onto your web page:
<script id="tb12560">var button1 = new timelyButton("doedayspas", { buttonId: "tb12560", product: 12560});</script>
If you need any help, just give us a shout.
Booking buttons for staff
You can also add booking buttons for your staff. Click the link “Individual booking buttons for each of your staff” and follow the same steps as above.
Set your calendar start date
We’ve added a setting so you can configure when you would like your calendar to start from – e.g.:
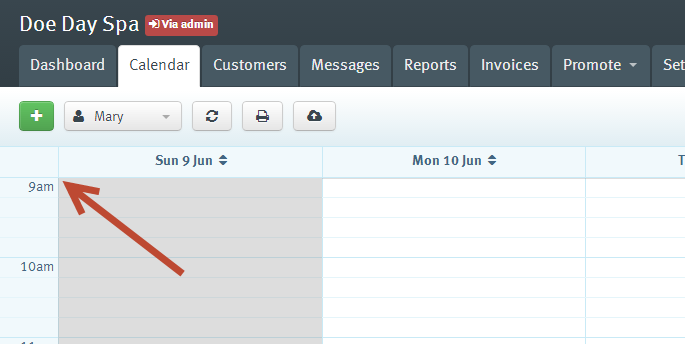
To change this to another time, go to Settings > General settings > Calendar and appointment settings and choose your own time under Calendar should start at
Search for customers by address
You can now search for customers by physical, postal and appointment address. Just type the address into the search box on the Customers tab and – viola! – we’ll show you all the customers that match that address.
Check out the Timely Tour for another look at online bookings.


Tip:
The Individual booking buttons are nice and work great. Even with custom book now buttons.
But It could be even better if it was possible to choose link to CATEGORY or service, so that the customer can choose a variation. (If service variations was implemented, this is not needed)
When clicking the book now button you would open the normal booking app, but the desired category already open and in focus.
Good suggestion and this is in our plans to add in the future. In the short-term we just wanted to get individual buttons out first and then build on it from there.
Great work guys. Is there an easy way to get a list of product IDs for someone using Timely. Would be a great feature to add to our Timely Booking button widget, they could select the service from a quick drop down. Just a simple JSON/XML feed would be enough.
Not currently - but please pop it into http://help.gettimely.com as a suggestion so its on our radar. In the meantime we can supply you product ID's via a spreadsheet. Just drop an email through to our support desk.